
Art Gallery 2006-7 Descriptions
THIS PAGE HAS BEEN MOVED AND WILL SOON BE DELETED!!!
Each image now has its own separate page, go to the gallery and select the images there in order to get to them. The descriptions there are likely to be more detailed.
To see the entire gallery, click here.
Each image now has its own separate page, go to the gallery and select the images there in order to get to them. The descriptions there are likely to be more detailed.
To see the entire gallery, click here.
Shaded Objects
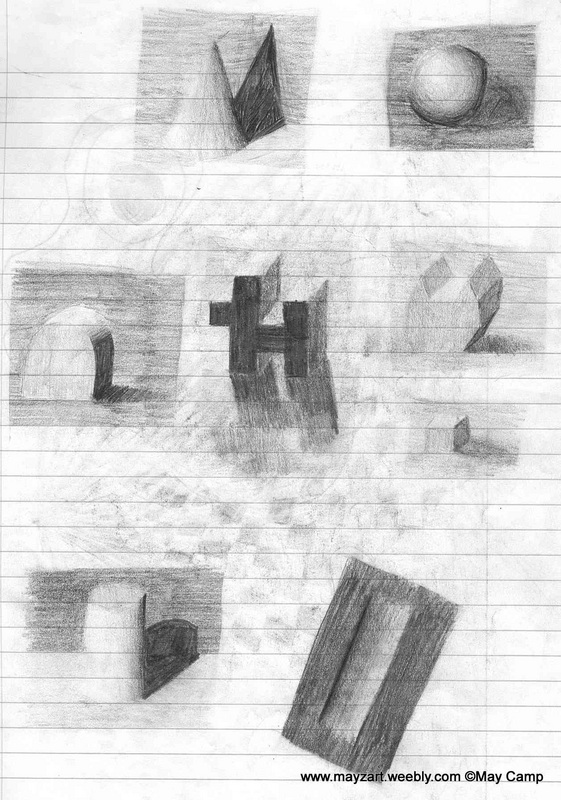
Date: High School Freshman, 2006-7
Time: About 30 minutes to an hour
Materials: Mechanical 0.5 pencil, notebook paper
Description: Shaded objects on lined paper. 3-d cone, ball/sphere, dog, cat cylinder, box, shapes. Doodles. Sketches.
Artist Comments: One of my oldest drawings. I was a freshman, and one of my AVID tutors taught me that making a background instead of putting an outline makes it look more realistic.
I've been using this technique ever since. It’s one of my favorite techniques! It’s incredibly entertaining to shade something and instead of drawing a line to define the edges, you just shade a different darkness around it to define the edges, and it actually looks better!
I love being able to use this technique to make fake things look more like they could exist in the real world. I also seem to get a lot of comments about my style of shading that makes it look like it was printed out instead of drawn with a pencil. Another note, I never smudge… I absolutely hate smudging! I think it makes it look messy and also lazy…
Checker Warp

Date: High School Freshman, 2006-7
Time: About 30 minutes to an hour
Materials: Mechanical 0.5 pencil, notebook paper
Description: A kind of optical illusion made by drawing equidistant points on the sides of the picture, picking two points and connecting them to all the other points of the picture. Then coloring in a checkerboard pattern.
Artist Comments: I learned this technique in 4th grade (in 2001). The technique is merely to put dots along the borders. In this drawing, I made them evenly spaced. Then I picked two points that I would connect to all the other points with lines. I colored it in a checker pattern, and it's finished!
I could use this technique in tons of other ways, basically, drawing any type of shape all over the board (as long as it is completely connected) and overlapping shape lines, then coloring checkerboard patterns will make quite an interesting piece.
Flying Dragons
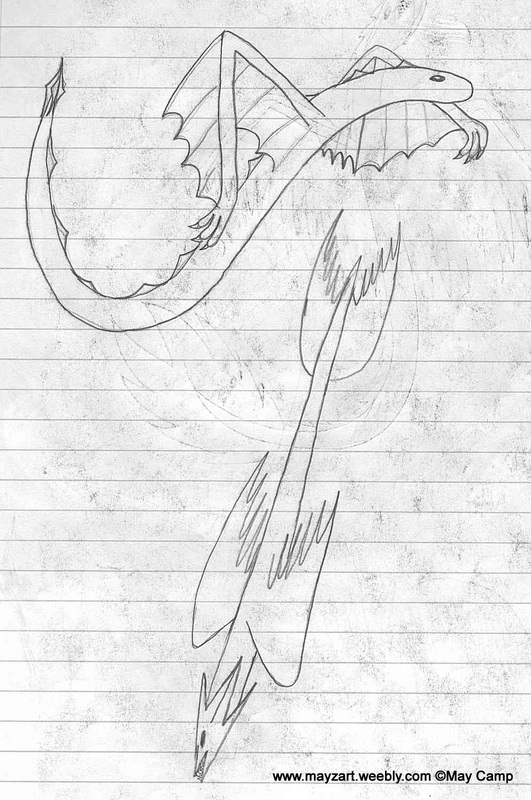
Date: High School Freshman, 2006-7
Time: About 5-10 minutes
Materials: Mechanical 0.5 pencil, notebook paper
Description: Two flying dragons. One is in a sideways, light S shape with its winged arms spread out, but a little bent at the elbows. It has no legs, so it’s more like a wyvern than a dragon. It is based off of a snake. The other dragon/wyvern is diving straight downwards with its wings folded more, it resembles an arrow somewhat.
Artist Comments: I started to develop a love for dragons in 8th grade. My first few dragons looked like snakes with wings like these ones, though these were the most realistic that I had drawn dragons, so I was very proud of them.
The top one (beside the scrawniness of the arms, which I still had not mastered) seemed to have a somewhat three-dimensional feel to it. The bottom one was more of a concept of what a dragon would do to go straight down as fast as possible.
I began to develop a love for things being as realistic as I could make them. I wanted to make my imagination come to life, and it would only look alive if it looked like it could exist in the world. I had a lot of work to do in my dragon-drawing process to make these look the best that I could make them.
Shaded Perspective
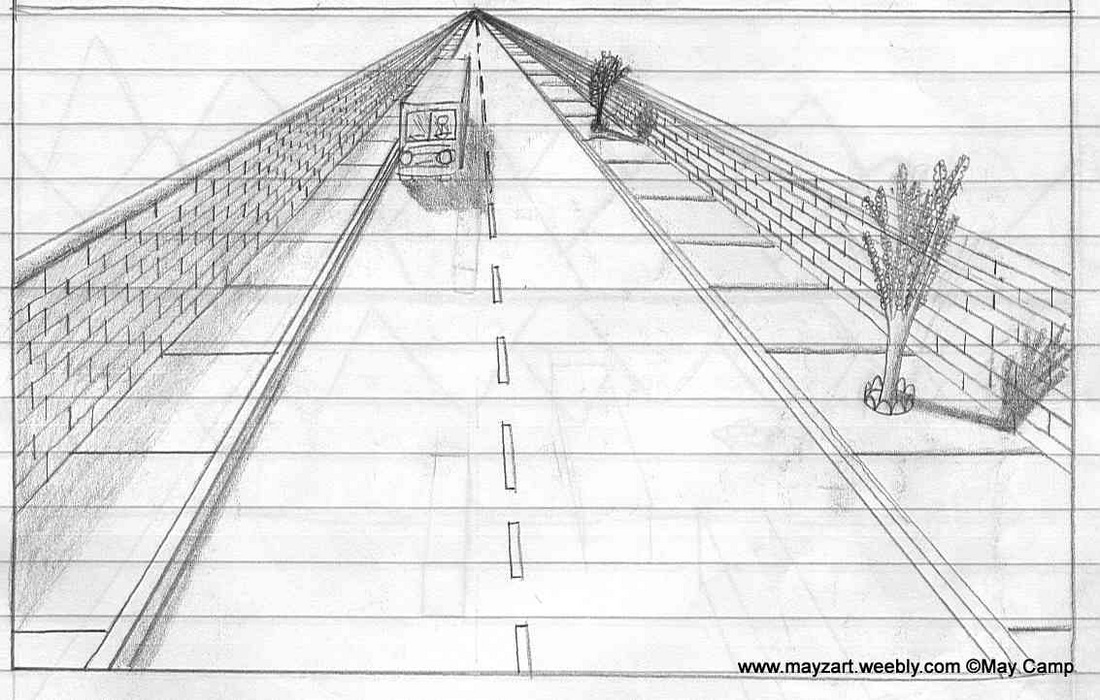
Date: High School Freshman, 2006-7
Time: About 1-2 hours.
Materials: Mechanical 0.5 pencil, notebook paper
Description: Perspective drawing of the street that has a bus traveling toward you. Sidewalk with trees on one side and brick walls on both sides. Shadows to make it look more three dimensional. Lines define the edges.
Artist Comments: My dad once taught me about perspective, and I used what I knew and my shading techniques to make it look nicer. This was mostly a practicing sketch, but I like how it turned out.
I didn’t use my realistic technique (of shading without lines defining the edges) in here because I didn’t learn it yet (these art pieces are somewhat out of order because this was such a long time ago). I drew everything with lines first, paying careful attention to the smallest details like the bricks in each well.
With this picture, I learned a lot about how things get smaller and the line spacing on the wall get closer and closer together. I drew the road lines in the middle first, and didn’t actually notice until much later that the lines should have become shorter and closer together faster, but I learned the idea with the bricks.
All I remember knowing before doing this was the point and how all the lines (except for vertical and horizontal stuff) go to that point, and the tops of the same sized trees would touch a line that goes to that point, that’s how I sized the trees.
My Drawing Pencil
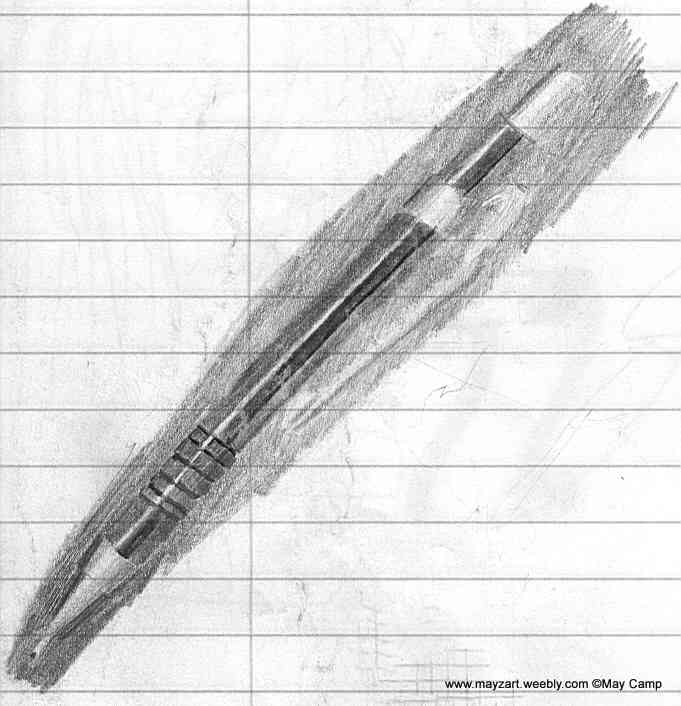
Date: High School Freshman, 2006-7
Time: About 30 minutes to an hour.
Materials: Mechanical 0.5 pencil, notebook paper
Description: A shortened, shaded, realistic drawing of a mechanical 0.5mm pencil, drawn with the same pencil. Black, silver, shiny.
Artist Comments: I drew this mechanical 0.5 pencil with this mechanical 0.5 pencil. I was bored in my homeroom class and I didn't know what to draw. While staring at a blank page, I started to look at my pencil and then.... inspiration!
I was just originally trying to draw the top of it, but then I figured I could do the bottom as well. However, this was in the corner of the page (the bottom left corner) and there was no room to draw the pencil in its full length. I shortened the pencil to fit, leaving out the boring middle of the pencil that has no designs on it.
I think most people seem to really enjoy seeing my drawings of still-life. Drawing still-life is a little boring to me because it involves no creativity, only drawing skill, which I already have. It’s great for practice, but it’s not something that I would define as art, unless I combined it with other things and angled it in a special way. A lot of people seem to enjoy my still-life’s though.
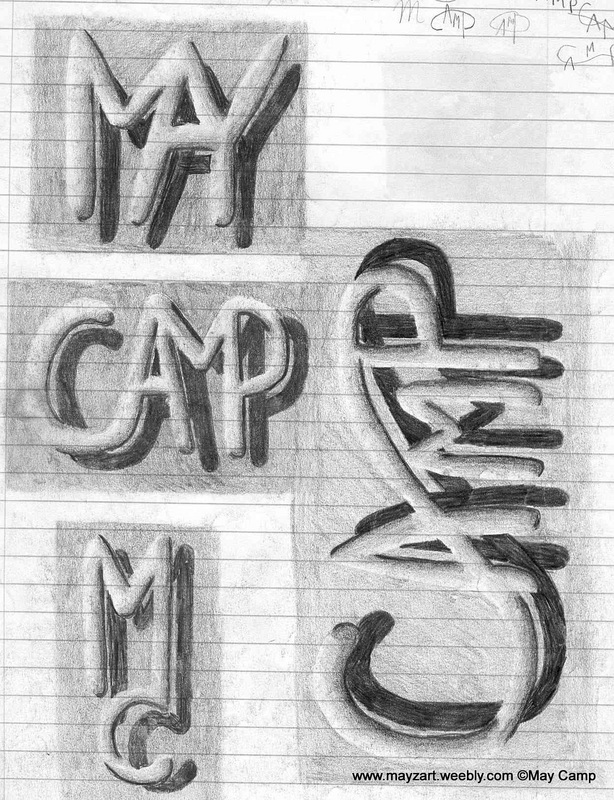
Shaded Name
Date: High School Freshman, 2006-7
Time: About a few hours
Materials: Mechanical 0.5 pencil, notebook paper
Description: Design of artist’s name, May Camp in a shaded, three dimensional looking way. Logo, typography, design, combining, linking letters, pencil shading. Sketches in corner.
Artist Comments: Somewhere around my last drawings on lined paper. I decided to draw my name in some fun way. Originally, I only wanted to practice shading with something that curves around, simple objects (like snakes and tubes). Then I decided to make my name in some type of logo that would be shaded this way. Eventually, this sideways "CAMP" became part of my logo as of today.
For me, it’s always fun to design things and rearrange things in interesting ways. You may have noticed the top right corner where I was doodling the name to try to find interesting ways to write it, and my favorite one was the one I shaded. It’s amazing how many designs that four simple letters can have…
Pumpkin Witch

Date: High School, 2006-ish
Time: An hour or so
Materials: Pumpkin, knife
Description: A pumpkin that was not carved from the inside, but carved on the outside. Picture carved was a witch silhouette in front of a moon. Orange, yellow, Halloween, broomstick, witch riding on broom, flying.
Artist Comments: I never knew how to carve pumpkins and my mom wanted to make pumpkin pie with this so I didn’t get to try it this time. Instead, I just took off the outer skin of the pumpkin and let the yellow, inner-skin of the pumpkin show the contrast in colors, creating the picture.
As an experiment of this technique I made up, I used the typical Halloween picture of a witch flying on a broomstick across the moon, so you can see the shape of her.
© May Camp. All art and photography (and all other creations of May Camp) is property of May Camp and cannot be taken, used, or copied (etc.) in any way without expressed and written permission from May Camp. All rights reserved.
